Build pilsen
This page provides instruction on building GanttProject 2.8 from the source code.
The instructions assume that you're using Ubuntu-based Linux distribution. The process on other distros and Windows/Mac OSX should be similar, modulo differences in packages/paths and the way command line terminal works.
Prerequisites
A bare minimum which you need is:
- Java SE Development Kit (JDK) version 8 from Oracle or OpenJDK. Later versions of JDK may or may not work for you. There were major changes in JDK packaging, and we did not test the build process with the latest JDK.
- JavaFX libraries. JavaFX is
bundled with Oracle's JDK 8, but if you're using OpenJDK then you need to install JavaFX separately. It is
available as
openjfxin Ubuntu repositories. - Gradle build tool for most of the development tasks. If you're going to build DEB package or Mac OSX app you'll also need ANT.
- Git version control to checkout the sources.
Please make sure that you can run java, javac, git and gradle commands.
Checking out the sources
The source code is stored in GitHub repository. You can clone the repository using
git clone https://github.com/bardsoftware/ganttproject.git
We also publish self-sufficient archives with the sources of the stable versions. The latest published is GanttProject 2.8.9
The rest of this page assumes that you checked out the sources using one of the ways into /tmp/ganttproject directory.
Branches
GanttProject 2.8 code sits in a branch named BRANCH_2_8_9.
Having cloned the repository, you can switch to that branch with git checkout BRANCH_2_8_9.
Building with Gradle
If everything is OK with your environment then the following will build a binary distribution of GanttProject:
    cd /tmp/ganttproject/ganttproject-builder
    gradle updateLibs distBin
The distribution is assembled in ganttproject-builder/dist-bin directory. You can
run GanttProject using ganttproject or ganttproject.bat script:
    cd /tmp/ganttproject/ganttproject-builder/dist-bin
    ./ganttproject
You can also start GanttProject using gradle runApp which will build a distro and launch
GanttProject as necessary.
Basically, that's everything that you need to be able to change the sources using any text editor, build and run the changed code.
Building and running from IntelliJ IDEA
The instructions below apply to IntelliJ IDEA but other popular IDEs can also be used in a similar way.
IDEA supports Gradle out of the box.
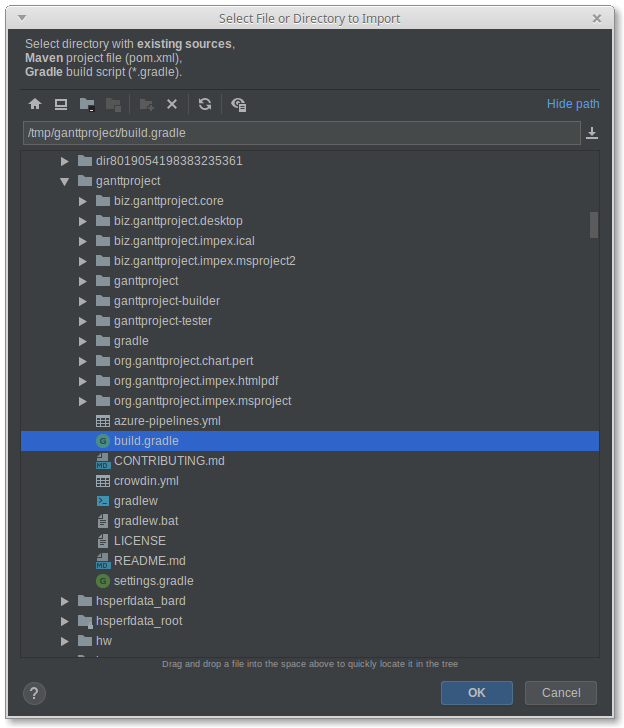
You can just import GanttProject with File.New.Project from Existing Sources menu action in IDEA
where you need to choose ganttproject-builder/build.gradle file. When asked about the modules,
uncheck module .. as shown on the screenshot below
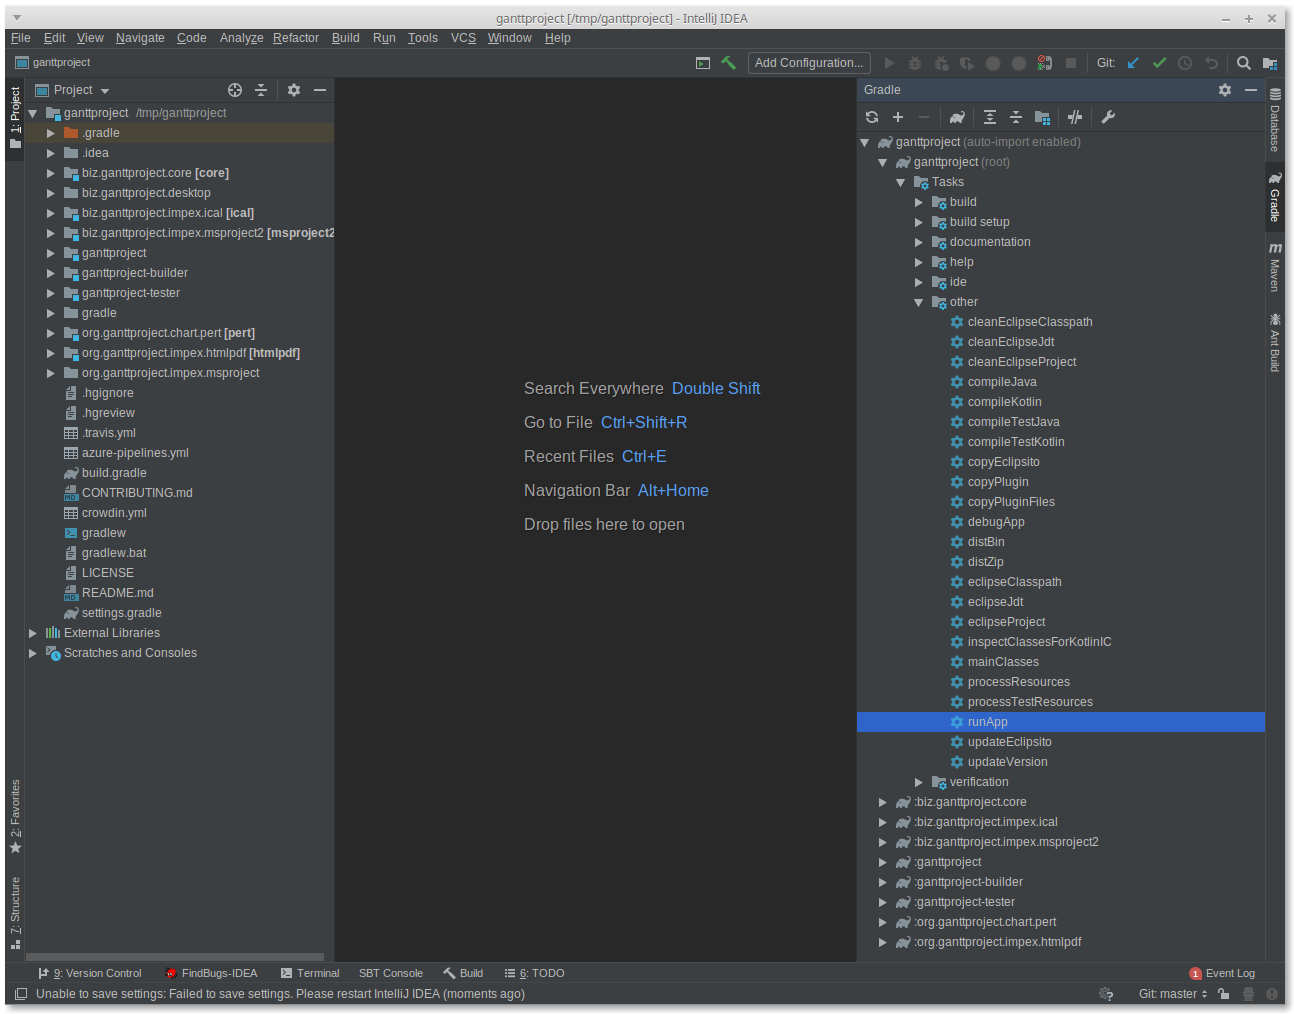
Having completed the import, you can run GanttProject using Gradle's runApp task. Open Gradle
pane in IDEA, find task runApp in ganttproject-builder/build.gradle file,
right-click and choose Run or Debug.
Building and running from Eclipse
The instructions below were tested with the latest Eclipse 4.6.2 aka Neon.2 and assume that Gradle integration is set up properly (e.g. you have set paths to your local Gradle distribution) Your mileage may vary.
- Generate Eclipse projects using
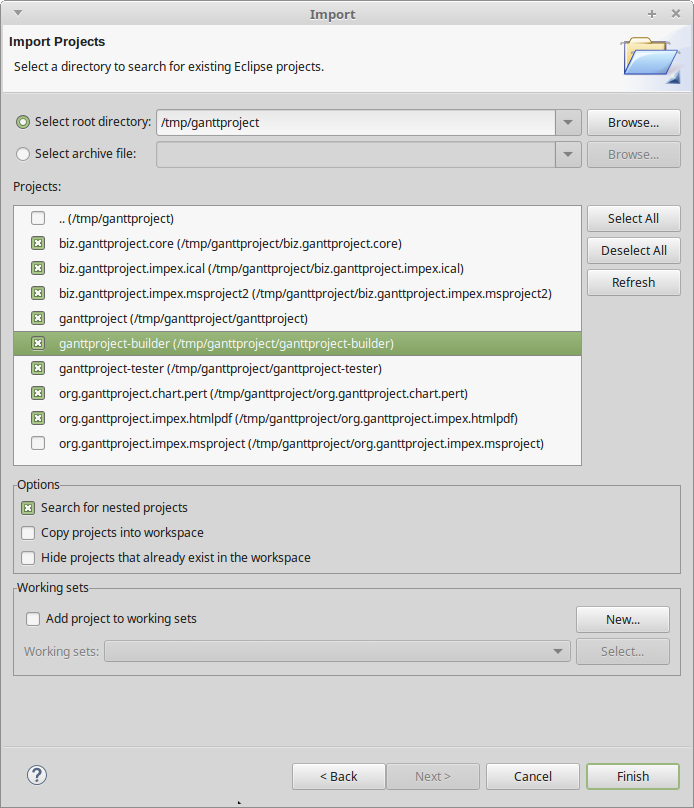
gradle eclipsecommand executed inganttproject-builder. It generates.projectand other files in each project's directory. - Use import wizard
Existing projectsfromImportmenu in Eclipse to import the generated projects into the workspace.
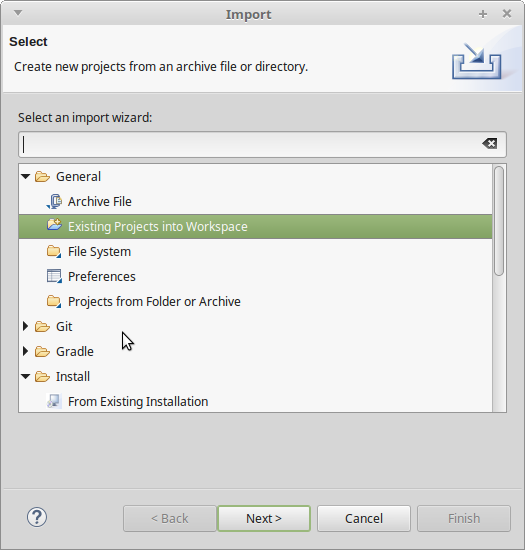
- Choose the root folder
/tmp/ganttprojectand checkSearch for nested projects. Uncheck the root project..(/tmp/ganttproject)
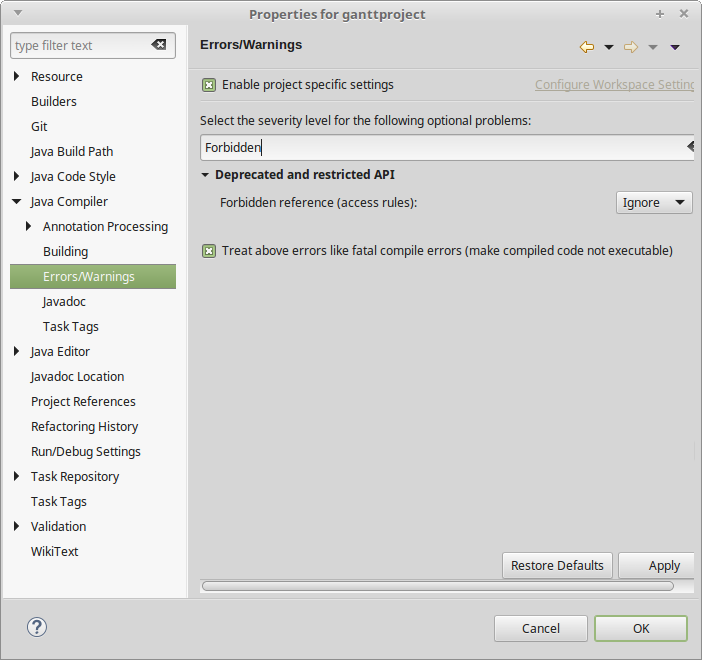
- You may need to ignore JavaFX API restriction for
ganttprojectproject.
When import is completed and all projects have been built successfully, you can run GanttProject using Gradle's runApp task wrapped into Eclipse run configuration.
- Right-click on
ganttproject-builder/build.gradleand chooseRun As. - In the run configurations dialog choose Gradle and click New configuration button.
-
Specify
runAppas task name,ganttproject-builderas working dir.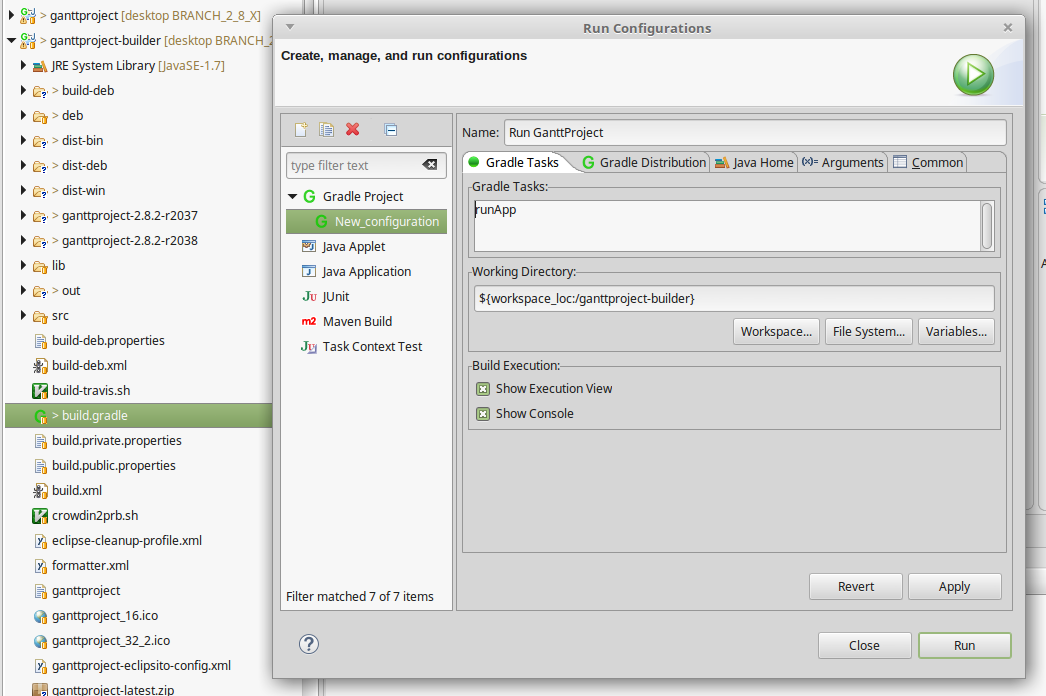
Debugging from Eclipse
To be able to debug GanttProject you need to start it in debug mode and attach to the debug port from Eclipse
- Run
gradle debugAppinganttproject-builderfolder. Java Machine will start and immediately stop waiting until debugger attaches to port 9009 -
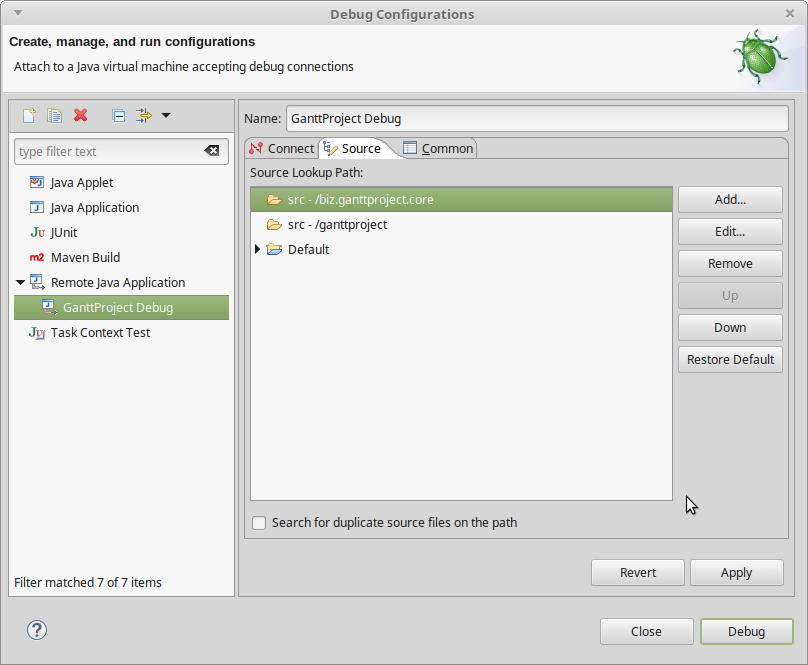
Create new Debug Configuration in Eclipse (e.g. by right-clicking
ganttproject-builder/build.gradleand choosingDebug As). Specify port9009and optionally checkAllow terminationcheckbox.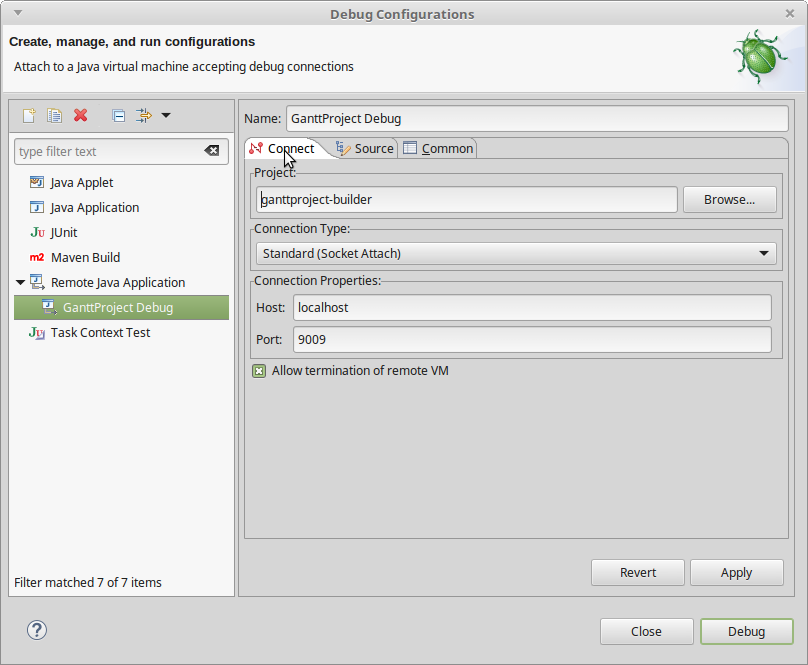 1. Now when you run this debug configuration, Eclipse will try to connect to port localhost:9009 and
GanttProject which is waiting the connection will resume.
1. You may want to add some sources to the debug configuration so that Eclipse could
map info from the debugged application to the source code.
1. Now when you run this debug configuration, Eclipse will try to connect to port localhost:9009 and
GanttProject which is waiting the connection will resume.
1. You may want to add some sources to the debug configuration so that Eclipse could
map info from the debugged application to the source code.